Create a Home-School Yearbook
Yearbooks are both wonderful keepsakes and great learning tools. Here are some tips for how to create a great yearbook for your homeschool.
Planning:
The first thing you will want to do is to sit down and make some notes about who is to be included and involved with your yearbook project. If your family is large, you'll probably find that the older, high school age children are the most interested. If you work with a larger homeschool organization or group of homeschoolers, you will probably want to get together with them and figure out a plan of action. The earlier in the year that you start your project, the better, especially when you are going to be working with those other groups. That way, you can help to make sure that there will be enough photographs and other material to work with.
Again, as early in the year as you can, start a yearbook committee and plan for them to get together on at least a monthly basis. Here you can begin to assign departments to different students - such as official photographer, copywriting, and layout and design.
As far as software, you will likely want to see if you can get something along the lines of the Adobe Creative Suite. This will include PhotoShop and InDesign, which should be enough to do the project from beginning to end. These programs are the industry standard, and it is very useful in real world terms for students to be familiar with them and know how to use them.
Organization:
There are no hard and fast rules on how to organize your yearbook, but the some of the same sections you would find in a public school yearbook should apply here too. You should make sure to have plenty of photos of every activity and plenty of group photos to choose from. Make it a point to tell your photographer or photographers to snap away liberally throughout the year so that when you are starting to go through the photos you will have plenty to choose from.
Divide your book into chapters and sections based on classes, and make sure to assign someone, such as your copywriter, to write captions for each of the photos.
It will, of course, make the entire project easier if you keep up with activities as the year progresses rather than trying to frantically put something together at the end of the year. To that end, as suggested above, you should make sure that the yearbook committee meets on a regular basis and doesn't get too far behind.
Printing and Binding:
If the photos you use are going to be in color, you will want your graphics person to make sure that they are fairly high resolution, and that you use a high quality digital printer.
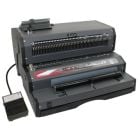
As far as binding, you can send it away or have your local print shop do the job. You may be interested to know, however, that the machines that do this kind of hardcover binding can be purchased new for less than $100, and are easy, fun and educational to use. Having one of these machines on hand will also allow your students to create their own personal projects and books whenever they like, and to do so in mere minutes.